How to bind Radiomaster TX12Mk2 ELRS <> RP2 <> PX4

Hi all,

I’m stuck on my first build and looking for help. Apologies if this isn’t the right category.

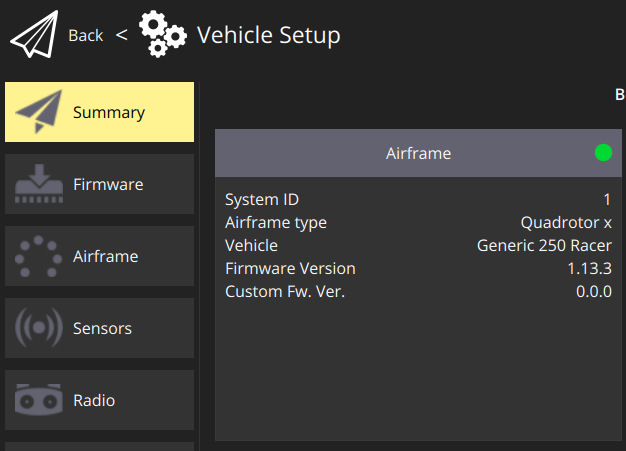
I have a Pixhawk 6c running PX4. I’ve soldered a Radiomaster RP2 ELRS receiver via port TELEM2 (because I read that the UART5 is capable of handling that communication) (TX to RX, RX to TX)

The RP2 lights up and I can get it in binding mode (2 pulsing lights). I have the RP2 unflashed/factory flashed. I can’t get it to bind with my TX12 MK2. I click on “bind” in the ELRS tool on the transmitter, however it doesn’t bind (i.e. the RP2 receiver doesn’t turn “solid green”). The Bind tool on TX12 just says “binding” and then exits after a few seconds. The RP2 remains in binding mode (double green flash) and after reboot goes to “wifi mode” (fast continuous blink)

My TX12 runs EDGETX 2.8.4
RP2 out of the box… 1.5 something (lost the sticker :grimacing: )

I’ve done a lot of searching but feel stuck enough to ask for help here.

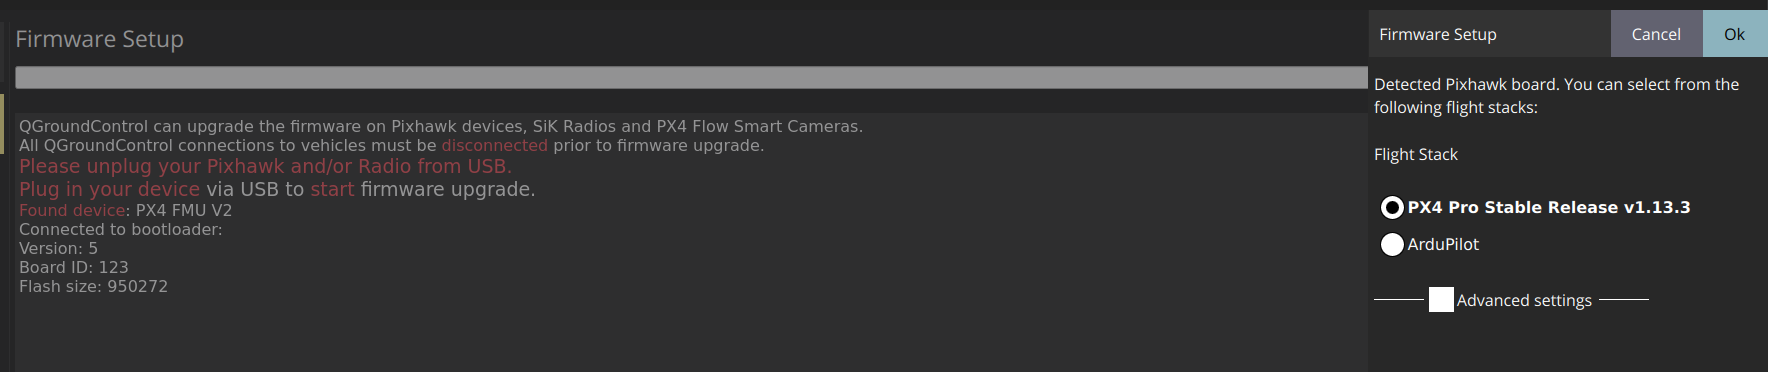
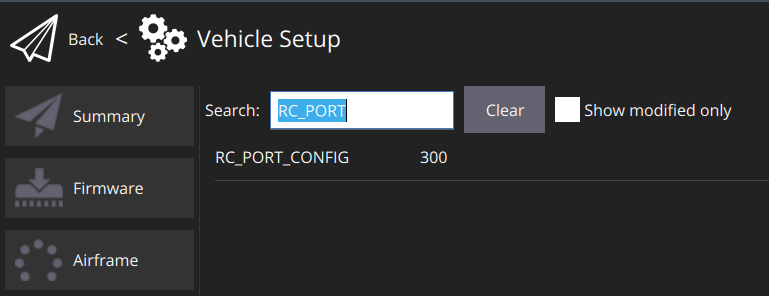
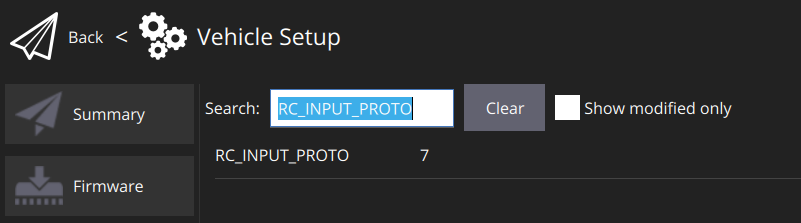
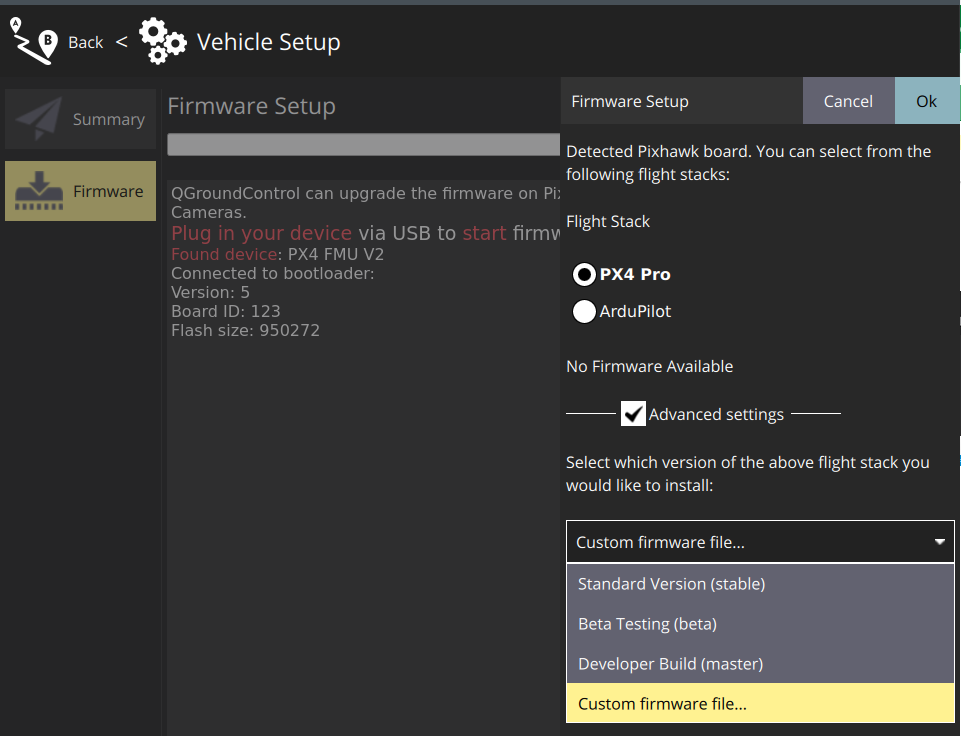
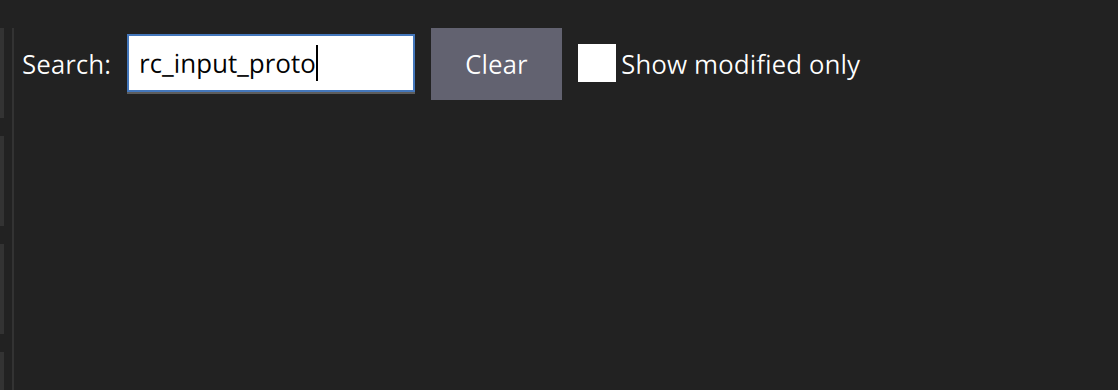
I reckon I have to tell PX4 that TELEM2 is connected to the RC receiver and “something with CSRF”, however I’ve come across some posts that this is possible in Ardu but not in PX4.

So far I’ve used the following tutorials:

Thanks in advance!

You are doing something wrong on Radiomaster. The receiver should bind no matter what flight controller you are using (it could only have power wires connected).

Thank you! I’ve made some good steps after many hours of figuring it out. I’ve finally BOUND the receiver/transmitter using these steps (for whomever it may concern in the future).

Solution (to those who encounter same problem)

  1. figure out out how to connect to both the Receiver and the Transmitter via wifi (A Complete Guide to Flashing and Setting Up ExpressLRS - Oscar Liang)

  2. upgrade both ELRS firmware versions (not the same as the transmitter version itself!) to latest (3.2.1 at time of writing) using ELRS configurator. Build them with a passphrase and then connect to the device via wifi. On my Mac, the wifi networks emitted by the T and R were “hidden” in the wifi menu under this submenu. There was another gotcha here that is described in other places. My RP2 receiver came with firmware version 2.4 or something, and if you straightaway try to upgrade to 3.2 you get a “not enough space” error. I first flashed/upgraded to 2.5.2 and then did it again to 3.2.1

Screenshot 2023-07-16 at 21.13.35

So my R+T are now bound and getting a signal.

However, in Qgroundcontrol I’m still stuck getting a radio to be received by PX4.

I’ve switched my Pixhawk to Ardupilot because it gives some Serial controls that I couldn’t find in PX4… That hasn’t really helped so far either… So still figuring this out!

Make sure you select your port with the parameter RC_PORT_CONFIG.
It is also recommended to select the CRSF protocol with the param RC_INPUT_PROTO.

I don’t see those params in px4/qgroundcontrol. I’ve come across this page but it doesn’t help my situation, I think.

I’ve tried setting them by exporting params to file, editing file, then saving file to px4 again. But it says unable to write param.

Screenshot 2023-07-17 at 08.53.19

thanks for your work btw. “Bought you some coffee”

Thanks for the coffee!
What version of PX4 are you running? Make sure you install v1.13

1.13.3 on Pixhawk 6C

This is very unexpected.
Here is my setup, I have flashed v1.13.3


I verify it here
image
And then I can see RC_PORT_CONFIG

and RC_INPUT_PROTO.

btw.I have some issue with metadata (can’t see the name of the ports but let me know how it goes for you)

Hey, I went to check if the rc_input driver was added to Pixhawk 6C, and guess what, it was missing so this is why the RC param didn’t show up.

I build a fixed version of 1.13.3

You can flash it with

Thank you so much! I owe you one.

With your build I can finally see rc_port_config, but weirdly not input_proto. Will investigate further


but no rc_input_proto

btw should I be concerned flying on dev build?

It is not a dev, my changes are based on the latest 1.13 branch:

but no rc_input_proto

That is unexpected :thinking:, but maybe rc_input is not running. Try with rc_input status inside the mavlink console.
You can start it with rc_input start.

NuttShell (NSH) NuttX-12.1.0
nsh> rc_input status
INFO  [rc_input] not running
nsh> rc_input start
INFO  [rc_input] valid device required
ERROR [rc_input] Task start failed (-1)
nsh> px4io status
protocol 5 hardware 2 bootloader 3 buffer 64B crc 0x6210128859
8 controls 8 actuators 18 R/C inputs 2 analog inputs
 px4io_status
    timestamp: 170512494 (0.435205 seconds ago)
    voltage_v: 0.0000
    rssi_v: 1.1380
    free_memory_bytes: 1464
    pwm: [900, 900, 900, 900, 0, 0, 0, 0]
    pwm_disarmed: [900, 900, 900, 900, 0, 0, 0, 0]
    pwm_failsafe: [0, 0, 0, 0, 0, 0, 0, 0]
    pwm_rate_hz: [400, 400, 400, 400, 50, 50, 50, 50]
    raw_inputs: [0, 0, 0, 0, 0, 0, 0, 0, 0, 0, 0, 0, 0, 0, 0, 0, 0, 0]
    status_arm_sync: True
    status_failsafe: False
    status_fmu_initialized: True
    status_fmu_ok: True
    status_init_ok: True
    status_outputs_armed: True
    status_raw_pwm: True
    status_rc_ok: False
    status_rc_dsm: False
    status_rc_ppm: False
    status_rc_sbus: False
    status_rc_st24: False
    status_rc_sumd: False
    status_safety_off: True
    alarm_pwm_error: False
    alarm_rc_lost: True
    arming_failsafe_custom: True
    arming_fmu_armed: False
    arming_fmu_prearmed: False
    arming_force_failsafe: False
    arming_io_arm_ok: True
    arming_lockdown: False
    arming_termination_failsafe: False


0 raw R/C inputs
ADC inputs 0 1616
features 0x0004 RSSI_ADC
sbus rate 72
debuglevel 0

INFO  [mixer_module] Param prefix: PWM_MAIN
control latency: 68109 events, 23192848us elapsed, 340.53us avg, min 327us max 1047us 33.516us rms
INFO  [mixer_module] Switched to rate_ctrl work queue
INFO  [mixer_module] Mixer loaded: yes
INFO  [mixer_module] Driver instance: 0
Channel Configuration:
Channel 0: value: 900, failsafe: 0, disarmed: 900, min: 1075, max: 1950
Channel 1: value: 900, failsafe: 0, disarmed: 900, min: 1075, max: 1950
Channel 2: value: 900, failsafe: 0, disarmed: 900, min: 1075, max: 1950
Channel 3: value: 900, failsafe: 0, disarmed: 900, min: 1075, max: 1950
Channel 4: value: 0, failsafe: 0, disarmed: 0, min: 1000, max: 2000
Channel 5: value: 0, failsafe: 0, disarmed: 0, min: 1000, max: 2000
Channel 6: value: 0, failsafe: 0, disarmed: 0, min: 1000, max: 2000
Channel 7: value: 0, failsafe: 0, disarmed: 0, min: 1000, max: 2000

is what I get…

Can you try with this firmware:

I added TELEM3 as the default port.

With previous firmware, you can try

rc_input start /dev/ttyS1

How other ports are paired you can find here:

Yesssss after running your command I finally see it working :heart_eyes: :heart_eyes: :heart_eyes: Already bought you a coffee before, THANK YOU for your effort.

nsh> rc_input status
INFO  [rc_input] Max update rate: 250 Hz
INFO  [rc_input] UART device: /dev/ttyS1
INFO  [rc_input] UART RX bytes: 3
INFO  [rc_input] RC state: searching for signal: CRSF
rc_input: cycle time: 2025 events, 12785us elapsed, 6.31us avg, min 5us max 181us 5.666us rms
rc_input: publish interval: 0 events, 0.00us avg, min 0us max 0us 0.000us rms
1 Like

@Igor_Misic This is a long thread - is there some flaw in the docs I need to fix from this? (if you say yes, I will read it all more carefully!)

@hamishwillee nope, docs is ok.

Not quite the at the end yet it seems, even with your firmware, I need to run the start command at each restart. Is there a way to autorun this at boot?

It would really be great if there were specific start to finish examples in the docs. Details are everything, step-by-step instructions.