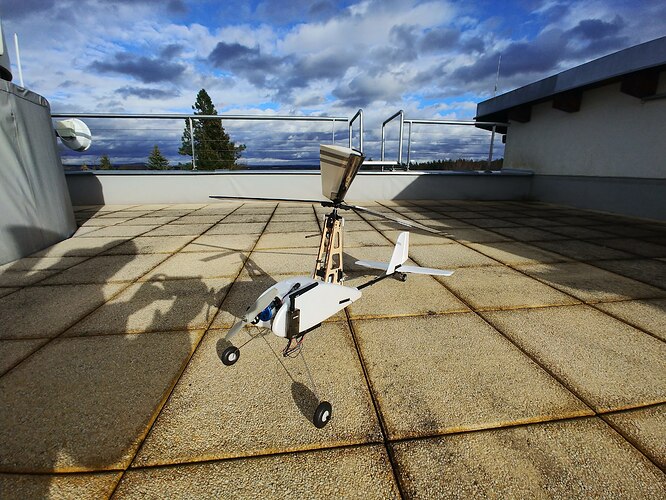
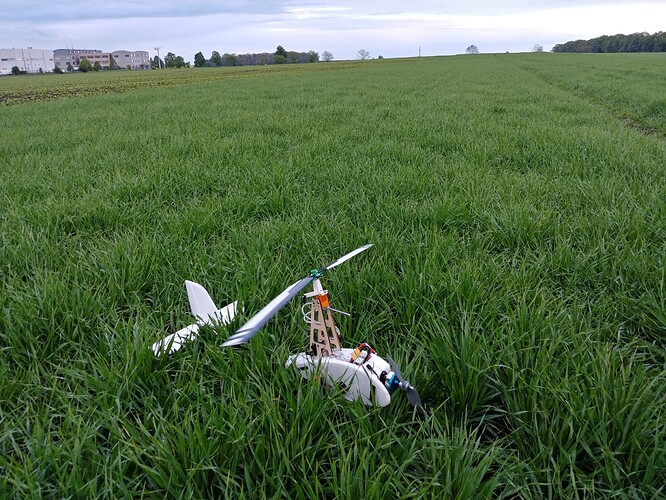
Auto-G2 gyrocopter with PX4 autopilot

Hi,

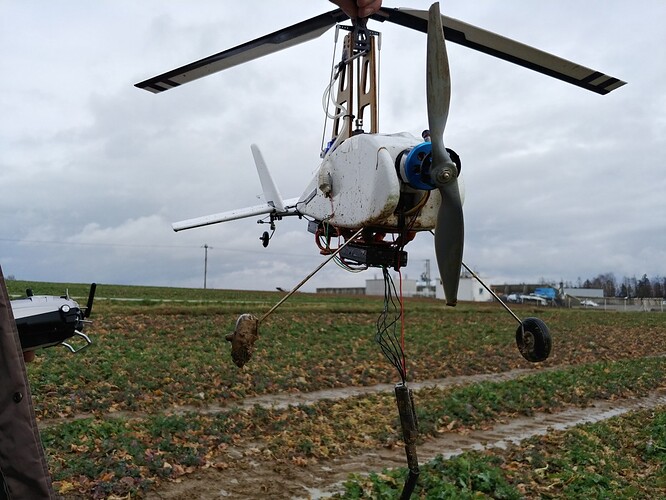
we have tried to fly with autogyro Auto-G2 with PX4 autopilot. After recieving the package from HobbyKing we were surprised, that model is more similar to the airplane (fixed-wing) then autogyro (as here http://www.aviastar.org/theory/autogiro/fig12.gif ) This is because it is possible to control only thu roll axis of the rotor-head. And elevator and ruddle is so big and efficient to compare with autogyro body mass. So we decided to try model with fixed-wing regulator.

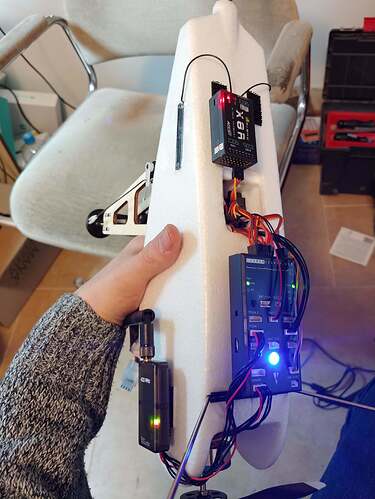
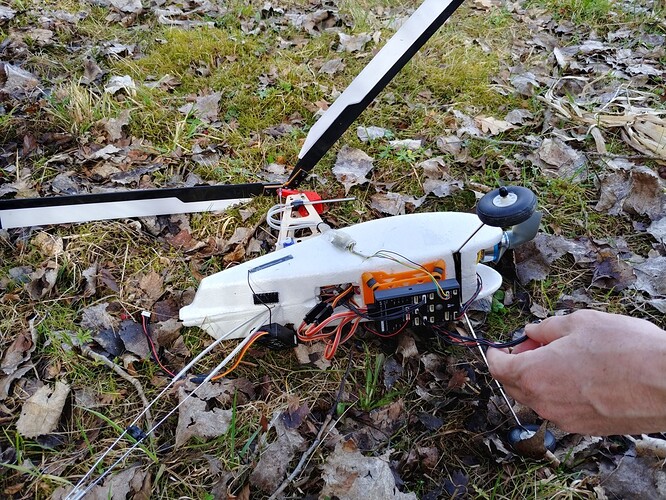
The first thing we had to solve was how to attach autopilot with all accessories to such small autogyro. Autopilot, RC receiver, Telemetry radio and airspeed sensor were attached from outside with loop and hook fasteners. Pitot pipe was mounted on the top of top pilon using a hot-glue.
Battery, Power module, small GPS with antenna and regulators were placed inside.

After the installation and wiring of all equipment, we have measured the center-of-gravity. It was a few cm from the rear side.

Software

As I mentioned earlier we have decided to use a fixed-wing regulator. So, we have created new autogyro Airframe and corresponding mixer with limits for this model.

First test

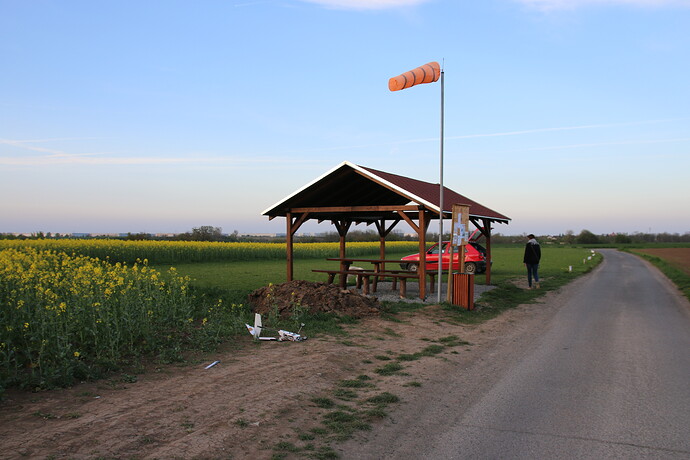
We have decided to make the first take-off from near model-airport with grass ground. After winter the grass was very short. But the surface wasn’t very smooth. The weather was not perfect. It was raining quite heavily and a wind was blowing. The main problem was, that we have forgotten to take scotch-tape to cover top service hole. Despite that, we have tried to start.

The first start was unsuccessful due to fear of adding throttle :slight_smile: and an unknown drag motor torque effect. After the second test (fall) the damages was as follows:

  • A torn telemetry receiver and autopilot (Torn from double-side tape).
  • Rotated tail wings.
  • The whole model was dirty from mud.

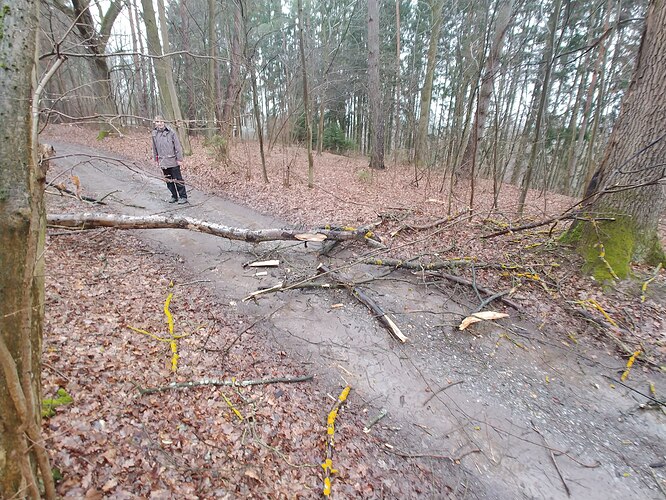
On the way back we had to clear the road of the fallen tree due to the strong wind. :smiley:

Preparation

After repairing all the damage, we were thinking of how to make the next start better and where to find a better surface. We have recharged batterries and wrapped all things (with scotch-tape :slight_smile:). A few minutes before departure, I have set thechanging flight-modes by one channel from RC (setting were: manual, stabilized and hold).

Second test

After arriving to a different place - a small hill it was still raining and the wind was 15 - 20 m/s. The surroundings were very muddy. We wanted to “take-off” drone during the run. I caught the drone, waited the rotor to spin up by autorotation and traied to run agains the wind. I did not fell any strong lift effect by the rotor. The next run was with the drag motor turned on and it had significantly better behaviour.

So we agreed that when I start to feel the lift from the rotor I begin to count down and then I will release it. After running with a higher speed and spin-up the rotor to higher RPM I released it. My colleague tried it to control it. He climbed with the drone to some altitude and tried to make wind-crossing because the wind was very strong. He made 4 controlled turns and then the drone was carried away by the wind. All area-defense functions were switched off. He remembered a newly added hold button and tried what it will do. It was more of surprise, because we have tried it only in gazebo simulator with the standard plane. The dron was about 1 km away and we had no visual contact. Visibility of the model under those weather conditions was maximally 200 m.

The only solution was to run to see the QGC if the plane was still flying. And suprisingly, it was flying! It even circled around its position somewhere above a forest in 60 m.a.e. We were very surprised. The only solution was to call the airoplane back. So I have clicked to map and made swipe to confirm. The hold mode loop ended and the drone got directions toward us. We had only a map to map with a red arrow to rely on.

After few minutes the drone started to make a circle above us. And QGC alerted us about the discharged batteries. Landing was made under the stabilized mode and thus it was very fast. However, the landing ended badly because the elevator was fully down during the whole landing. Therefore, the landing was completed without a landing flare.

https://review.px4.io/plot_app?log=068026df-aa7c-4db7-a2b4-d7790524d53b

HW

We have used PX4_FMUv3 autopilot.

QGS

Telemetry receiver was connected to our mission computer (Ubuntu 18.04) with MAVROS mavlink router and MAVLINK was routed through Ethernet cable to control the computer with QGC.

Next

As next improvement, we would like to make rotor-head with two free axes (roll and pitch). For that, we would like to use 3D print. It should be more similar to this The Theory of the Autogiro (fig. 12).

3 Likes

Cool, you were really lucky.

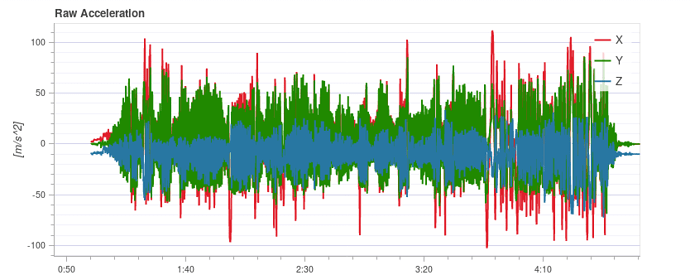
Btw the log shows really high vibration levels. I’d try to reduce those before attempting to fly again.

Really cool project and logs! Thanks for sharing

Thank you for the notice @bkueng. This is primarily caused due to rotor rotation. From spectogram we can determinate rotor frequency. But we can try to de-vibrate autopilot.

Nice report! Thanks for sharing :-).

I am very new to autogyros. What would that bring that the elevator cannot do? And also, how would you then control that (e.g. would it be on the same “stick control”/channel as the elevator, so that pulling on the right stick would tilt the elevator and pitch the rotor-head together?

Hello Jonas,

the fully controllable rotor head brings capability of controlled vertical autorotation for example.
It is a great advantage because the elevator needs a forward speed to maintain controllability.

No, the control regulator will have to be different.
Tilling of rotor around pitch axis changing forward speed and throttle of main motor controls pitch of body and climbing rate. Very briefly.

The behavior of this model (without these changes) is more like an airplane than a gyroplane.

Hi,

on the weekend of March 16th we made two tests.

The 1st test was made using different propeller (two blade propeller 10x8) and different 3D printed rotor plate because we have destroyed both of them during the last landing. This test aimed to verify the suitability of the new parts and test the behaviour of a position mode.

The takeoff was made from the hand, because the model has wheels too small to take off from the grass plane. After two minutes, the flying ended with a controlled impact on the ground. This was due to a non-optimal control of engine by the ‘position’ controller.

Log: https://review.px4.io/plot_app?log=43dd2657-44b9-4634-a0e4-80c665db3d4c
Video of flight: Auto-G2 Pixhawk test - YouTube


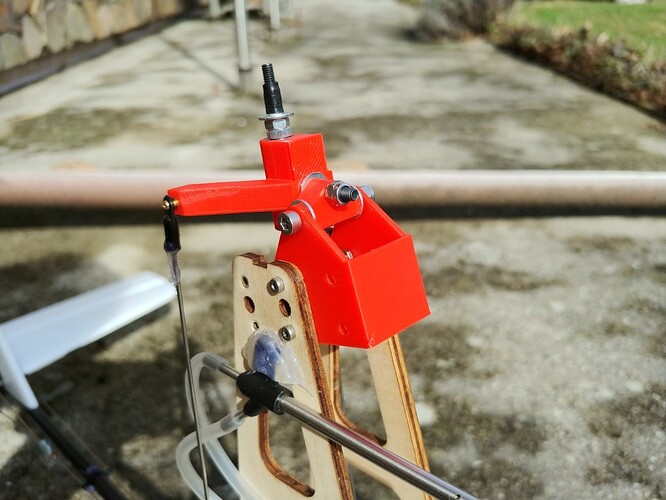
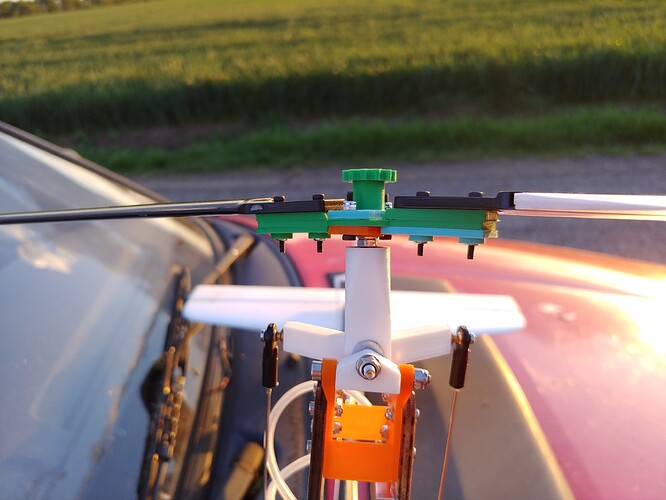
The second test was made with our new 3D printed rotorhead. This rotorhead allows us to move the rotor head in roll and pitch axis. (The original rotorhead was free in roll only.)

After assembling of the whole rotorhead, we found some problems. The biggest one was that the end of the rotor blade was very close to tail wings. And at the smallest pitch of rotorhead, it even hits the rudder. Therefore we have moved rotorhead forward. We have also removed prerotator.

For this test, we have adjusted the mixer file — especially the setting of rotorhead actuators. Pitch of the rotor is obtained from AUX channel.

M: 2
O: 7500 7500 0 -10000 10000
S: 0 0 10000 10000 0 -10000 10000
S: 3 6 -7000 -10000 0 -10000 10000

M: 2
O: 7500 7500 0 -10000 10000
S: 0 0 10000 10000 0 -10000 10000
S: 3 6 7000 10000 0 -10000 10000

Test conditions:
wind around 2 m/s
Sunny weather, 18C

Take-off was made again from hand. After release, the aircraft had quickly lost altitude even with full of throttle. After several turns and an increase in height, the pilot felt loss of engine thrust. He tried to make some more circles -some of them in ‘stabilised’ mode and some of them in ‘hold’ mode.

In the last turn (in hold mode) the aircraft lost its height and crashed into a tree. After the impact the telemetry module and the RC receiver was disconnected from the autopilot. So we didn’t have any response from aircraft immediately after the accident.

Causes of fall are several:

  • Lost of engine thrust:
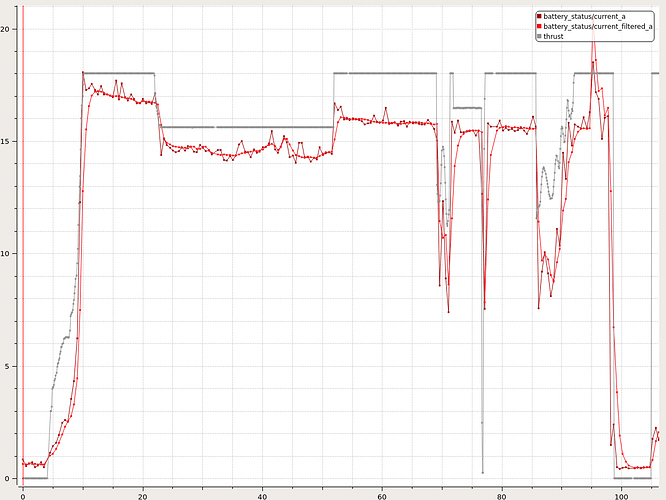
    Due to overheating of original ESC the engine thrust was decreasing. It is possible to see on the next graph, depicting the comparison of throttle setpoint and consumed current.

ESC was placed under batteries in plastic tubing and in polystyrene body of the autogyro.

  • Too large tilt:
    We set the default values of maximal pitch and roll setpoint. Pitch setpoint was sometimes too large, and it was hard to reach this setpoint in conjunction with the previous problem.

  • Rotor pitch tilt was too large.

  • Center-of-gravity was too height.

Log: https://review.px4.io/plot_app?log=e2ffd81d-6fc1-4158-bdf6-cccfe1b3721d
Video: AutoG2 autogyro with PX4 autopilot - takeoff 5 - YouTube

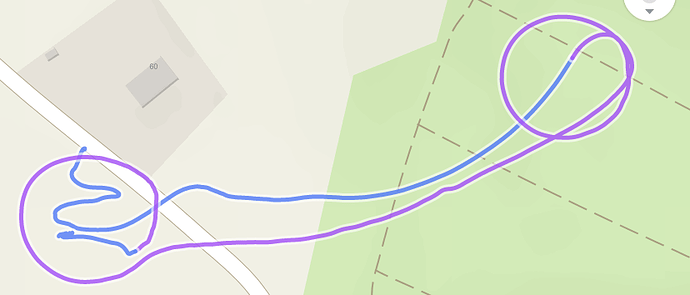
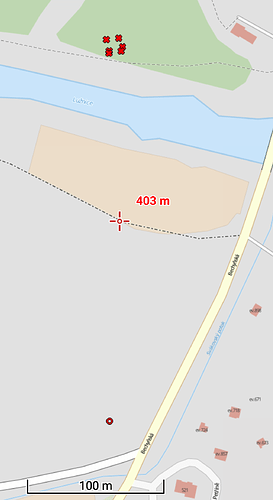
Autogyro crashed and fell down a few meters behind the river. Then we had to move to the site of the accident and the search for all parts began. Location of all parts can beseen on the next map.

(Little off-topic question: Why are all parts in dark colours? And not in bright ones to find them more easily? :slight_smile: )

We have found a problem with the damaged antenna. (mentioned here: Antenna for telemetry module SiK radio)

We have decided to keep the model from to last test for its spare parts and we have ordered a new piece.

Next weekend we made a next test with a modified rotor-head.
Modifications included a change of rotor axis position. Axis was moved a few cm forward to obtain rotor position as in original rotorhead.

Next improvement was removing the ESC from the heat-sink tubing and relocating them outside of the autogyro for better cooling. Original ESC has a linear 5V source, and it already produces a lot of heat when only powering the servos.

We have also changed some parameters of autopilot. Especially setpoint range.

  • roll: Âą 25 deg
  • pitch: 20 - -15 deg
  • airspeed: min: 10, cruise: 15, max: 20

Weather conditions:
Temperature: 20C
Wind: Light wind

After experience from the previous flight, we chose a larger area for testing. The takeoff was made again by a throw. The flight was done in ‘stabilised’ and ‘hold’ mode.

This was our first flight without any damage.

The main problem with this flight was that the aircraft was not able to make round circles in hold mode. It could have be caused by a low setting of roll setpoint limit and the default size of hold circle.

The next problem was that the autopilot couldn’t control accurately the turning and estimated value overshot the setpoint several times.

Log: https://review.px4.io/plot_app?log=fffdd64b-481e-4eb2-a6c2-fa16e3536135
Video: Auto-G2 gyrocopter with PX4 autopilot. Take-off 6 - YouTube

1 Like

Very cool, thanks for the reports! :slight_smile:

1 Like

Test with fully controlled rotor head.

From the last post, we have made several more flight tests. Most of them were very similar to the test described above. In the last tests, we had several problems. The biggest problem was the loss of GPS fix due to broken coax from the antenna to the GPS module. Therefore I landed over a kilometer away in stabilized mode. GoTo mode does not work without GPS. We landed near to model airport that we didn’t know before. :slight_smile:

Firmware update, new mixer
Last weekend we decided to skip the test of updated firmware and to make a long-planned change. The change included swapping of our autogyro control elements. The change was made in the mixer. The pitch output was mapped to the rotor pitch, and the elevator was mapped directly from aux port (RC side slider) without the possibility of control from autopilot regulators.

Shear pin
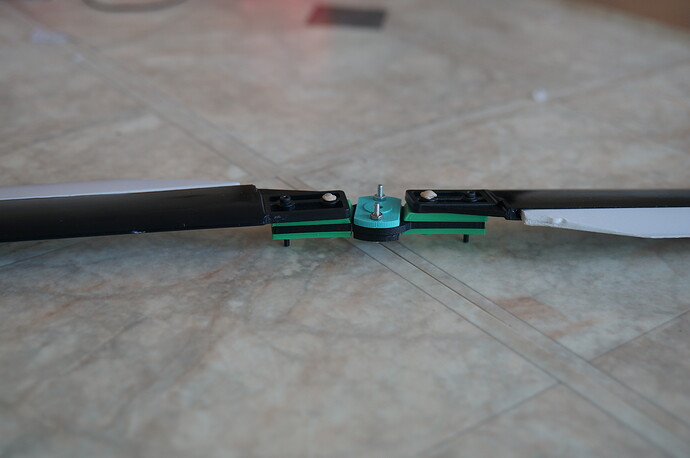
Another more significant change was in attaching the rotor blades. We have found on several web sites that a shear pin can be used to reduce the risk of rotor blade damage. We made shear pin from a piece of PLA filament wire (1.75 mm in the hole for the M2 bolt). The filament was melted, and from both sides of holes and something as a hot rivet was made.

TakeOff #20

The start was done again from the run with full throttle. After releasing, I climbed with the use of the elevator with the rotor in the default position. After making the first turns I returned the elevator to the neutral position and tried to use the rotor pitch to control climbing/decreasing. I couldn´t see any visible response from the controls. Therefore I slightly controlled the elevation using the elevator — the pitch of the rotor controlled mainly the forward speed of the gyroplane. The Control elements changing had a great contribution on successful landing because the rotor (pitch) control was more accurate, and it was possible to do steep descent under better control.

https://review.px4.io/plot_app?log=9da89966-dc4c-4191-8750-55aa7cdd9db6

TakeOff #21

In the next flight, I was trying not to use the elevator. Therefore I climbed higher. The main discover of this flight is that controlling of the (body) pitch can be done only with the rotor. However, the response to control is very slow and must be done simultaneously with the control of motor thrust.

Review

After reviewing the logs we found several problems:

The first problem was that we had a poor quality of GPS fix (again). Is it possible that this was caused by high vibration?

The second problem is that the rotor with shear pin fuse had large vibration. This problem could be solved by replacing our “rivet” with a nylon screw.

And the third problem is with the quality of the telemetry connection. The telemetry transmission was interrupted during the flight several times. RSSI was not logged, but from the log, it is possible to see that autopilot wanted to send the data (TX rate is not null), but nothing was received from GCS (QGC). RX rate is null. This condition occurred 230 seconds after the start, which is interesting. It is possible to see RSSI in QCG, but QGC log file was occurred and it is not possible to open this file.

1 Like

Very nice report! On the last video (and in general), in which mode are you flying? Are you using your fork of PX4? Or are you flying manually?

Hi @JonasVautherin,

We fly mainly in stabilized mode. But lately, we have experimented with position mode and fully autonomous modes (Hold, GoTo, Mission, …). It works surprisingly well. But some SW adjustments might be needed. Under normal (wind) conditions, it works well, but in the stronger wind, it wants to do some restrictions. We are using own fork.

We also tried to make a star from the ground.

I’ll try to describe it more in other posts.

2 Likes

The autogyro autopilot configuration has been finally merged into the source code.

We just wrote the PX4 Auto-G2 user guide page.

1 Like

Super awesome! Thank you for the contribution :tada:

Just a note to everyone interested in this topic. The outdated Auto-G2 design was replaced by more featured, continuously available, and developing ThunderFly TF-G2 autogyro.

1 Like