Trying to flash firmware from QT Creator, and I’m running into this error.
make: *** No rule to make target ‘upload’. Stop.
/usr/bin/make exited with code 2
upload command works from the command line, so why can’t QT creator find upload?
Trying to flash firmware from QT Creator, and I’m running into this error.
make: *** No rule to make target ‘upload’. Stop.
/usr/bin/make exited with code 2
upload command works from the command line, so why can’t QT creator find upload?
Hi Deafro,
Have you solved your problem yet?
I have encountered the same situation. Thank you!
I couldn’t solve it, so I employed a round about solution. Rather than editing the code in QT creator, I would edit on github and clone the file to linux, then compile through the command line.
Thanks for making such a comprehensive toolchain guide ! We are almost there. I also managed to build and upload from the command line, but can’t get the IDE setup to work.
Seeing that there is also 3 other users voicing their problem with getting QT Creator setup working (http://dev.px4.io/starting-building.html). A small update to that section would definitely be helpful.
I’m also stuck at the builds, but doesn’t upload stage!.
Also I don’t know how to change which configuration to build - seems like posix_sitl_default is the only one available - it can’t find px4fmu-v2_default. Posix_sitl_default.cmake is also the only config I can find from within QT Creator.
I uploaded screenshots of my settings.


When You are completely new to PX4 and QT Creator it’s also a little hard to know when you got it right, when you don’t really know what to expect 
Thanks
I use “make upload/fast” instead of just upload. Makes it slightly faster 
Hey aokholm,
I have the still same problem with uploading via QT.
Unfortunately I can’t see your screenshots.
However, is there already a working solution to the QT-upload-problem?
Cheers,
Daniel
Hi Daniel
Now I see the screenshots are broken, I just thought that it was my bad internet connection! Well I didn’t manage to get it working, so they perhaps they are not so useful anyway. If anyone found the right combination of settings - please share
Regards
Andreas
Hei
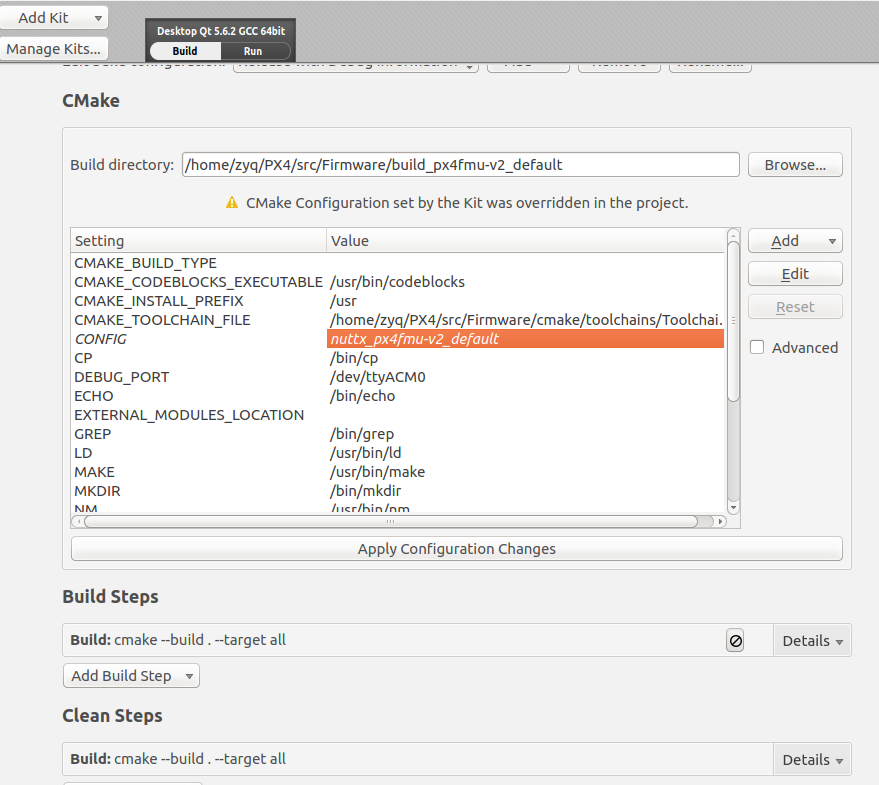
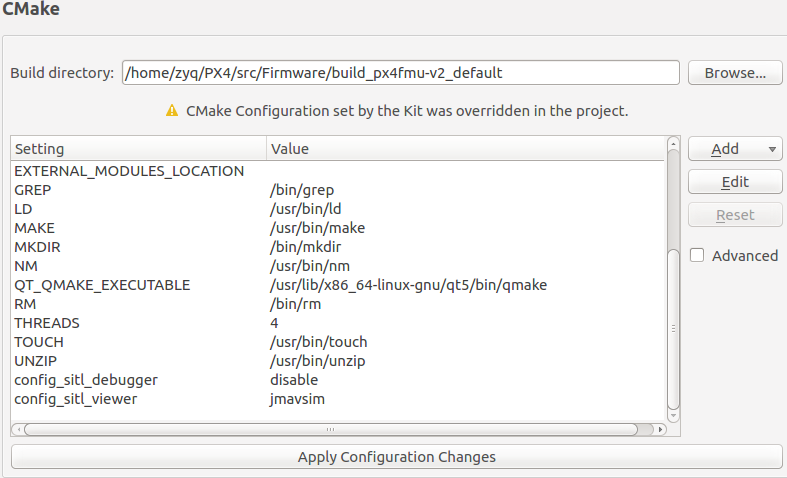
I had the same problem few weeks ago. First thing after you download ,you have to compile the px4fmu-v2_default, so do a make px4fmu-v2_default in the folder Firmware.
After that you should be able to open the project in QT with File > Open File or Project CMakeLists.txt. The build location has to be in the folder Firmware/build_px4fmu-v2_default otherwise the path are not valid.
Next step is to do a Run CMake. After that , you need to change PATH-variable like it is done in the tutorial-video.
And fo uploading, you need to add a Run configuration in the QT-Project settings. So go to Run settings > Run and add a custom executable. Set for Exectuable make and for Command line arguemts upload.
@Michael
Hi~
I worked under Unbuntu and I did what you said:
setting the build location to the folder Firmware/build_px4fmu-v2_default, and the value of CONFIG to nuttx_px4fmu-v2_default.
but from the picture, the CMake Configuration is still for building posix_sitl_defalut, not for px4fmu-v2_default.
And for the PATH-variable, what I would change to? I watched the video, but still don’t know.
Would you help me? Thanks.
I also had the "No rule to make target ‘upload’. Stop " error but I was able to figure it out. I hope this works out for everyone.
I am going to attach screenshots of my settings with some explanations where necessary.
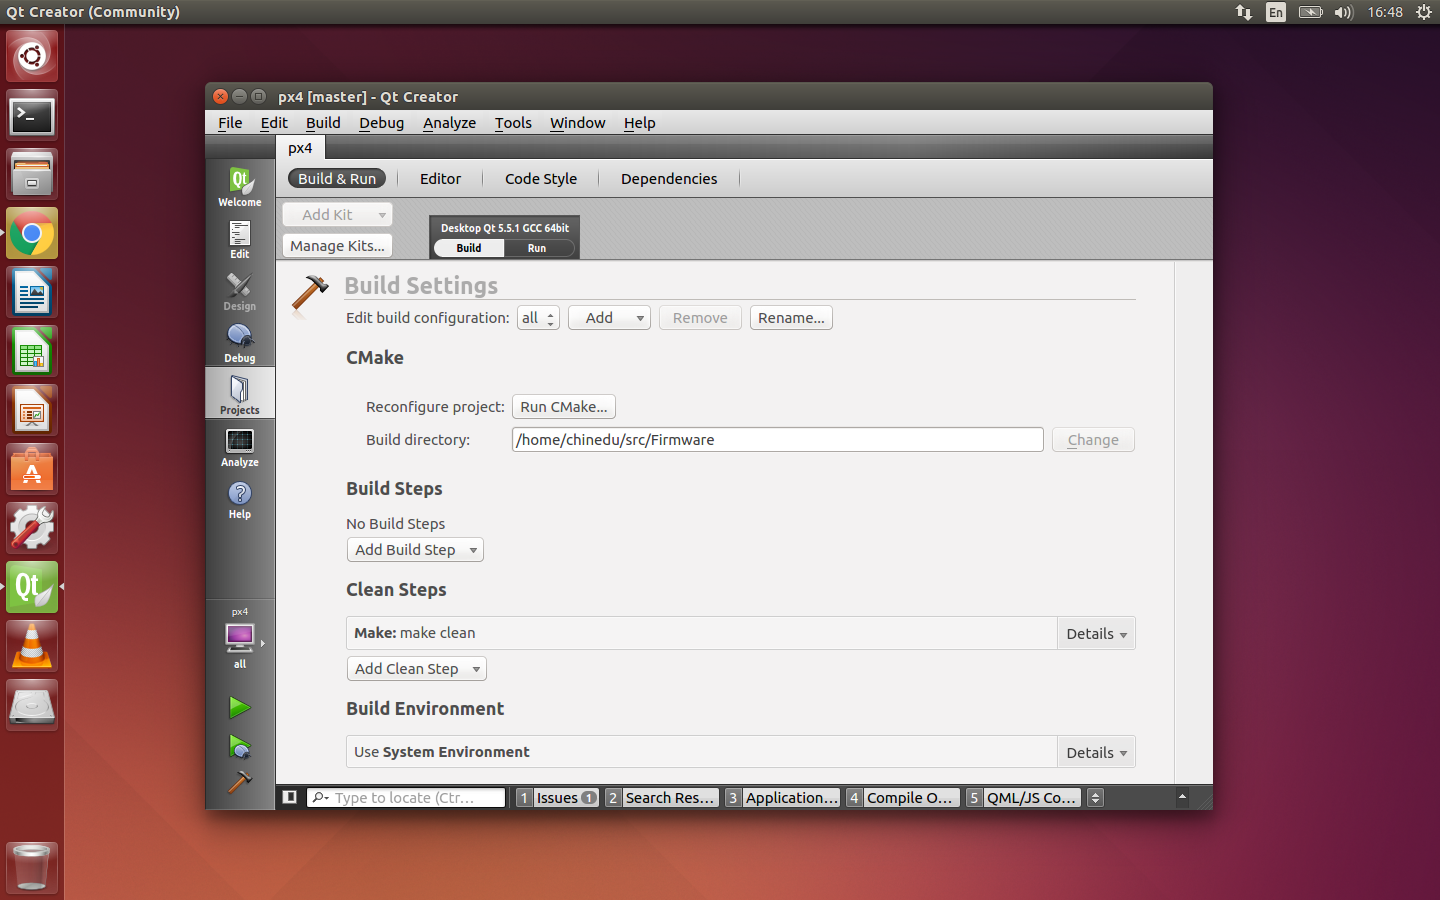
After loading the CMakeLists.txt in the root firmware folder via File → Open File or Project → Select the CMakeLists.txt file, I clicked on the Projects tab to apply the settings.
For the Build section, these are the settings I used:
For the Run section, these were the settings I used:
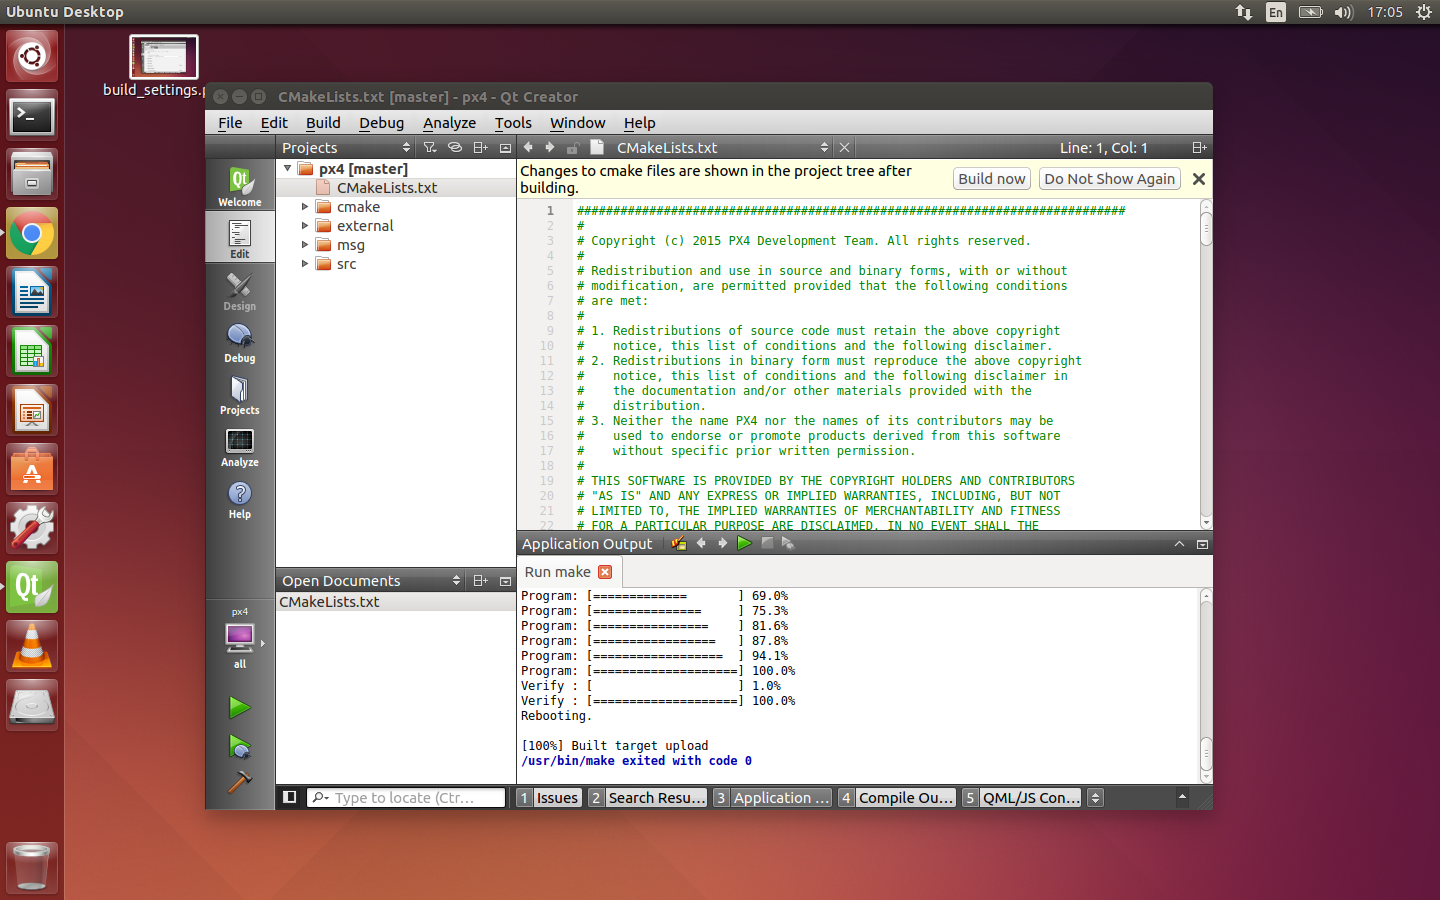
Under Run(After Deployment), click on ‘Add’ and choose ‘Custom Executable’. Fill in the Executable as ‘make’ and the command like arguments as ‘upload’. MAKE SURE YOU ADD THE WORKING DIRECTORY I USED. Other directories didn’t work for me, leaving it blank also leads to an error.
Then click on the Play Button and it should run perfectly and upload to the pixhawk. My result:
I hope this helps
Cheers,
Chinedu
I’ve spend the last couple of days while trying to find a solution for this problem. You sir made my day!!! Thank you so much. I did exactly the same thing as you’ve described and it worked.